Daily Expense Approval Screen
Daily expense page has the table that shows columns for ‘Expense Name’, 'Category', 'Amount', 'Date' of the daily expenses with ‘Check box’ as the first column for each row along with the Approve and Reject button on the top right. Manager can select one or multiple check box to approve/reject the claims submitted by the user.
Always click Save after making any changes to your artifact to ensure updates are stored successfully.
Create an Artifact
Follow the steps below to create a new artifact
- Navigate to the Dashboard → UI Fabric
- Open the Artifact section by clicking the "Artifact" tab in the navigation bar.
- Navigate to the application path: My Artifacts → Global-App-Group → reimbfast-app
- Click the (+) button at the bottom-left to create a new artifact.
- Enter a unique name for the artifact (e.g., Daily Expense Approval Screen).
- Click Create Artifact to confirm.
- Click Save to save the artifact and close the window.
Design a visual diagram
Designing the Layout This page consists of a table to display daily expenses as shown in below screenshot. Add the Table Node
- Drag and drop Table node from the Node Gallery onto the design canvas. Position the Table Node
- Right-click the Table node.
- Edit the Table node's properties.
- We can enable the page nation, table selection, table settings and table sorting as per the requirement in the ‘ElementInfo’.
- Position the table: As the table takes the entire width of the group, column start is 1 and column end is 13 which is the length of each group. Click here for details
- We can enable the page nation, table selection, table settings and table sorting as per the requirement in the ‘ElementInfo’.
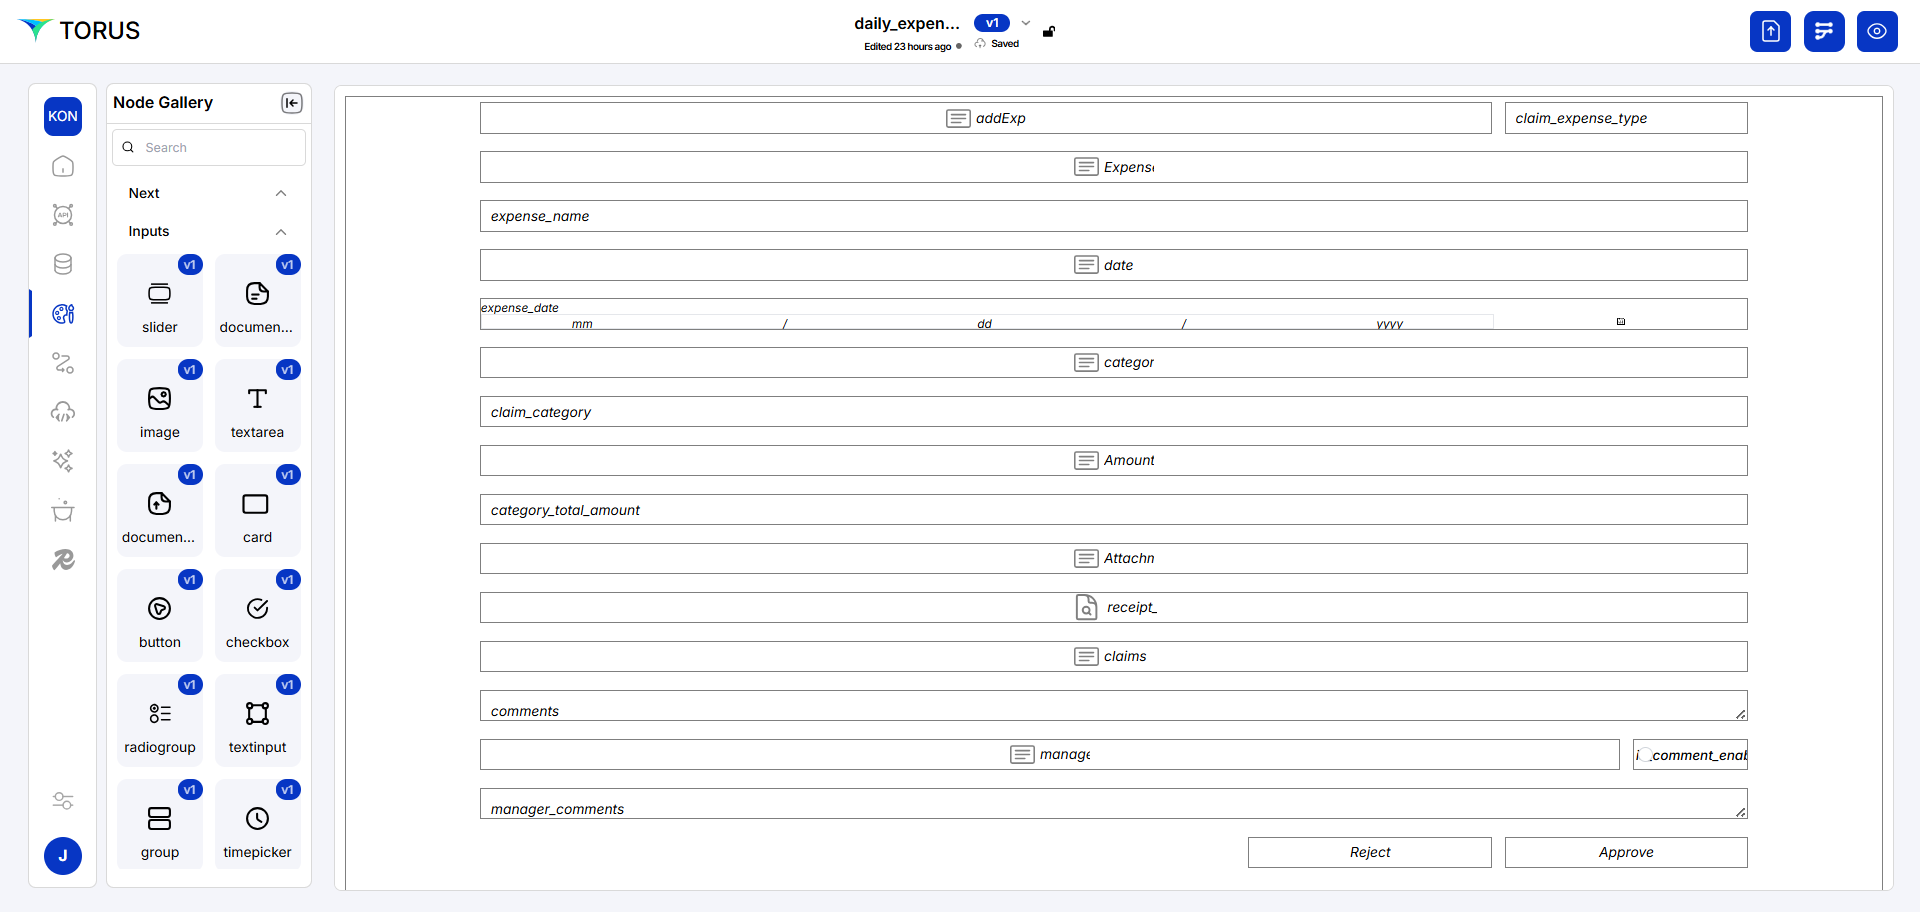
Define Table Columns
- Drag and drop multiple Column nodes into the Table node.
- For each Column node, right-click and edit its properties to set the "Label" to match the column headers visible in the screenshot:
- claim id
- expense name
- claim category
- category total amount
- expense date
- status
Orchestration
Mapping the get claims and daily expenses table as below. UI components on the right side and required fields are in the left side. (Refer here)
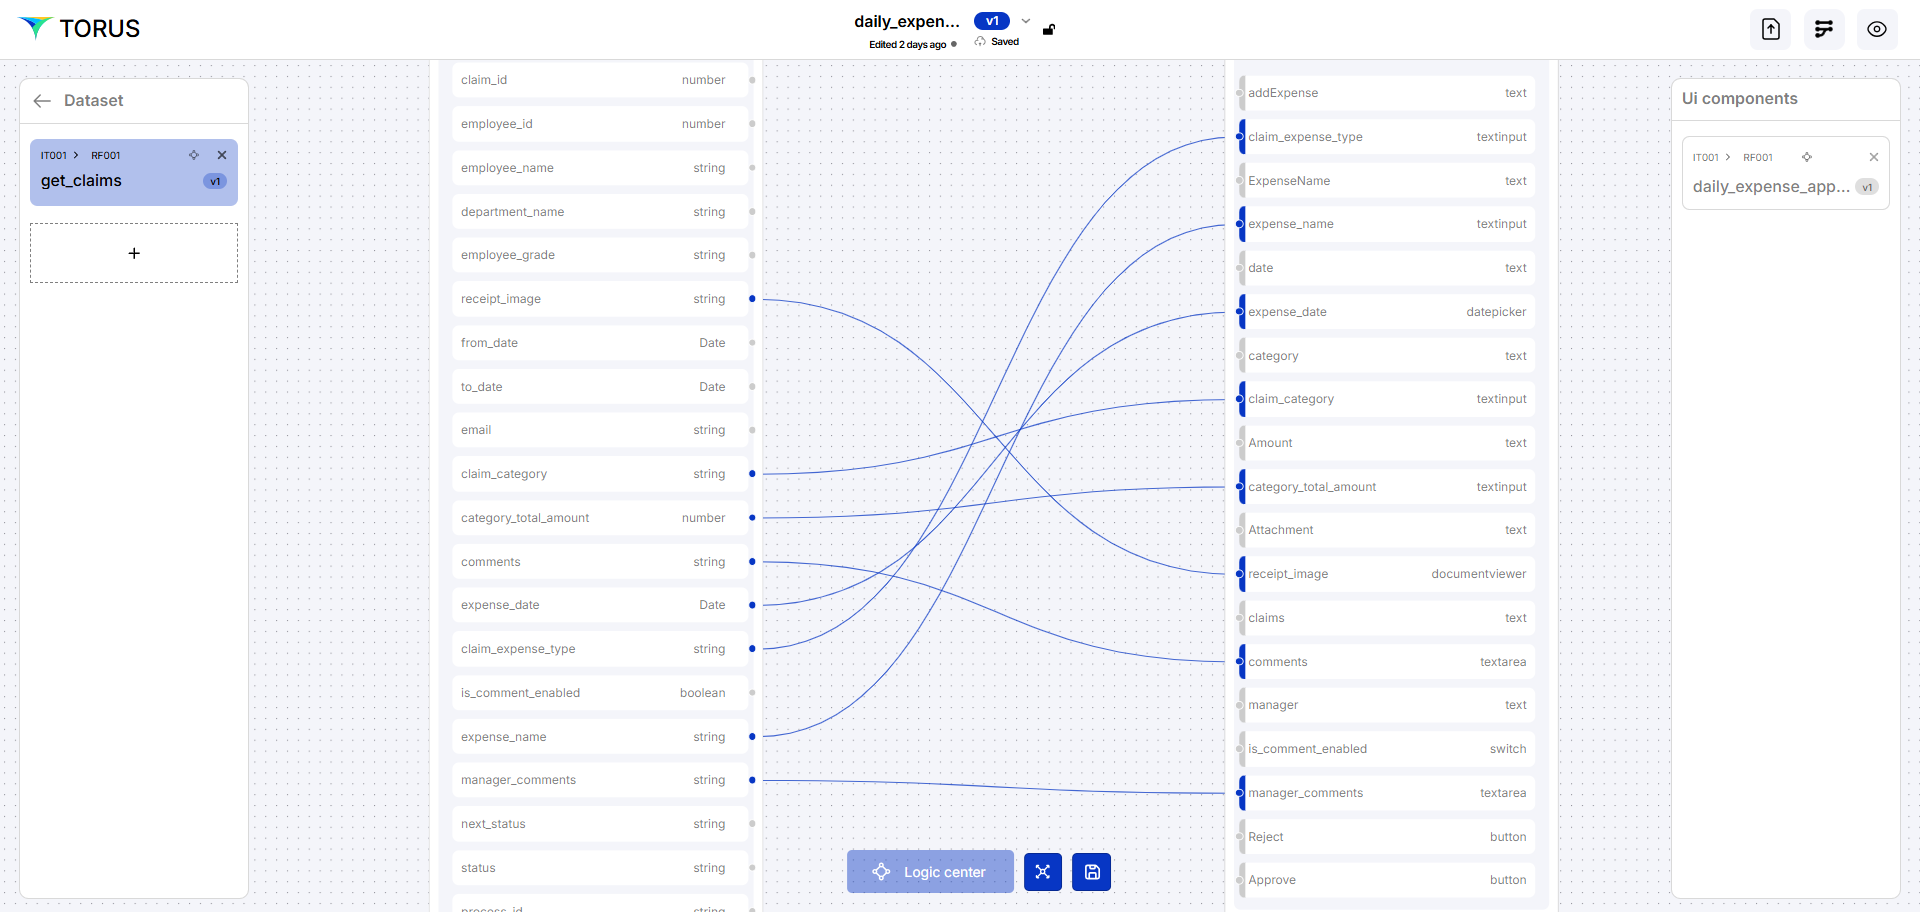
- The "get_claims" is a dataset used as the data source for the "Daily Expense" form. This dataset contains information about expense claims.
Logic center
We have to add Events for all three buttons…
- Add Button – It allows the user to Save the data and update the table
- Cancel Button - It allows the user to clear the data in the input fields on the screen
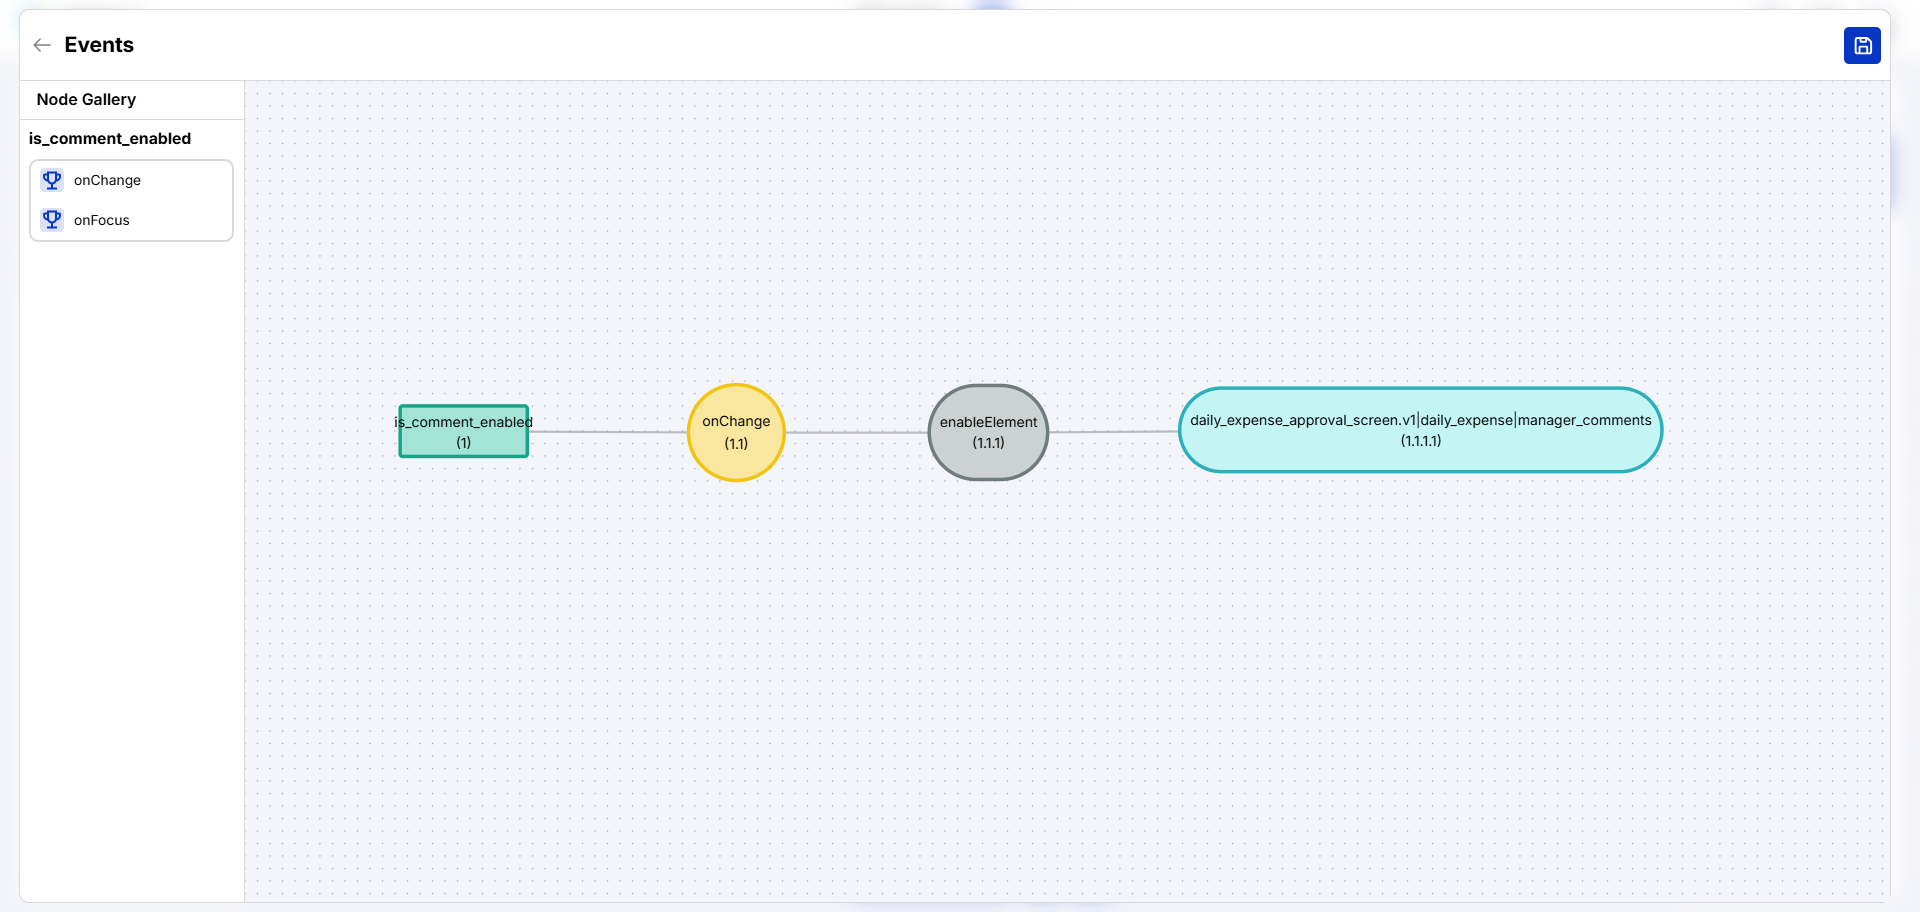
- Switch – It allows the user to enable the comment field so that the user can give comments if required.
- The Logic Center allows to define the actions that occur when users interact with UI elements (like buttons and switches) to manipulate data within the application if required.
- Accessing the Logic Center: Choose the UI component on the right side which enable to logic centre, click on it to open.
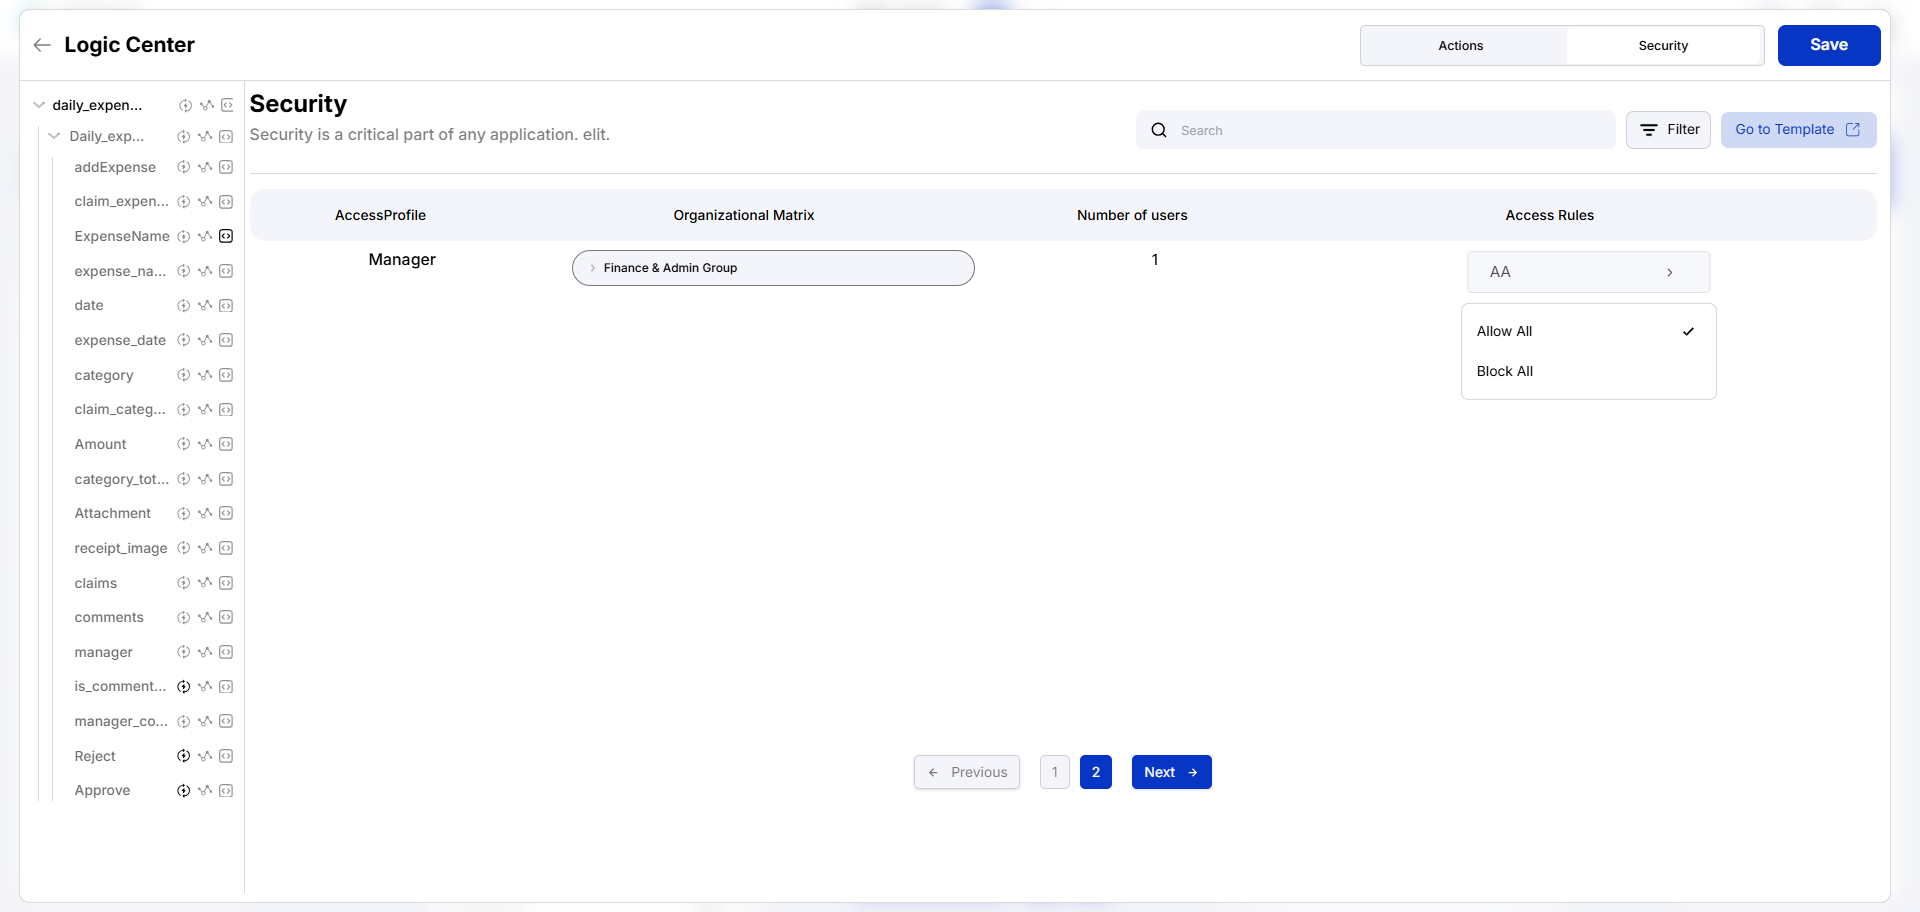
- Enable 'Allow All' function to manager.
- Enable 'Block All' function to user.

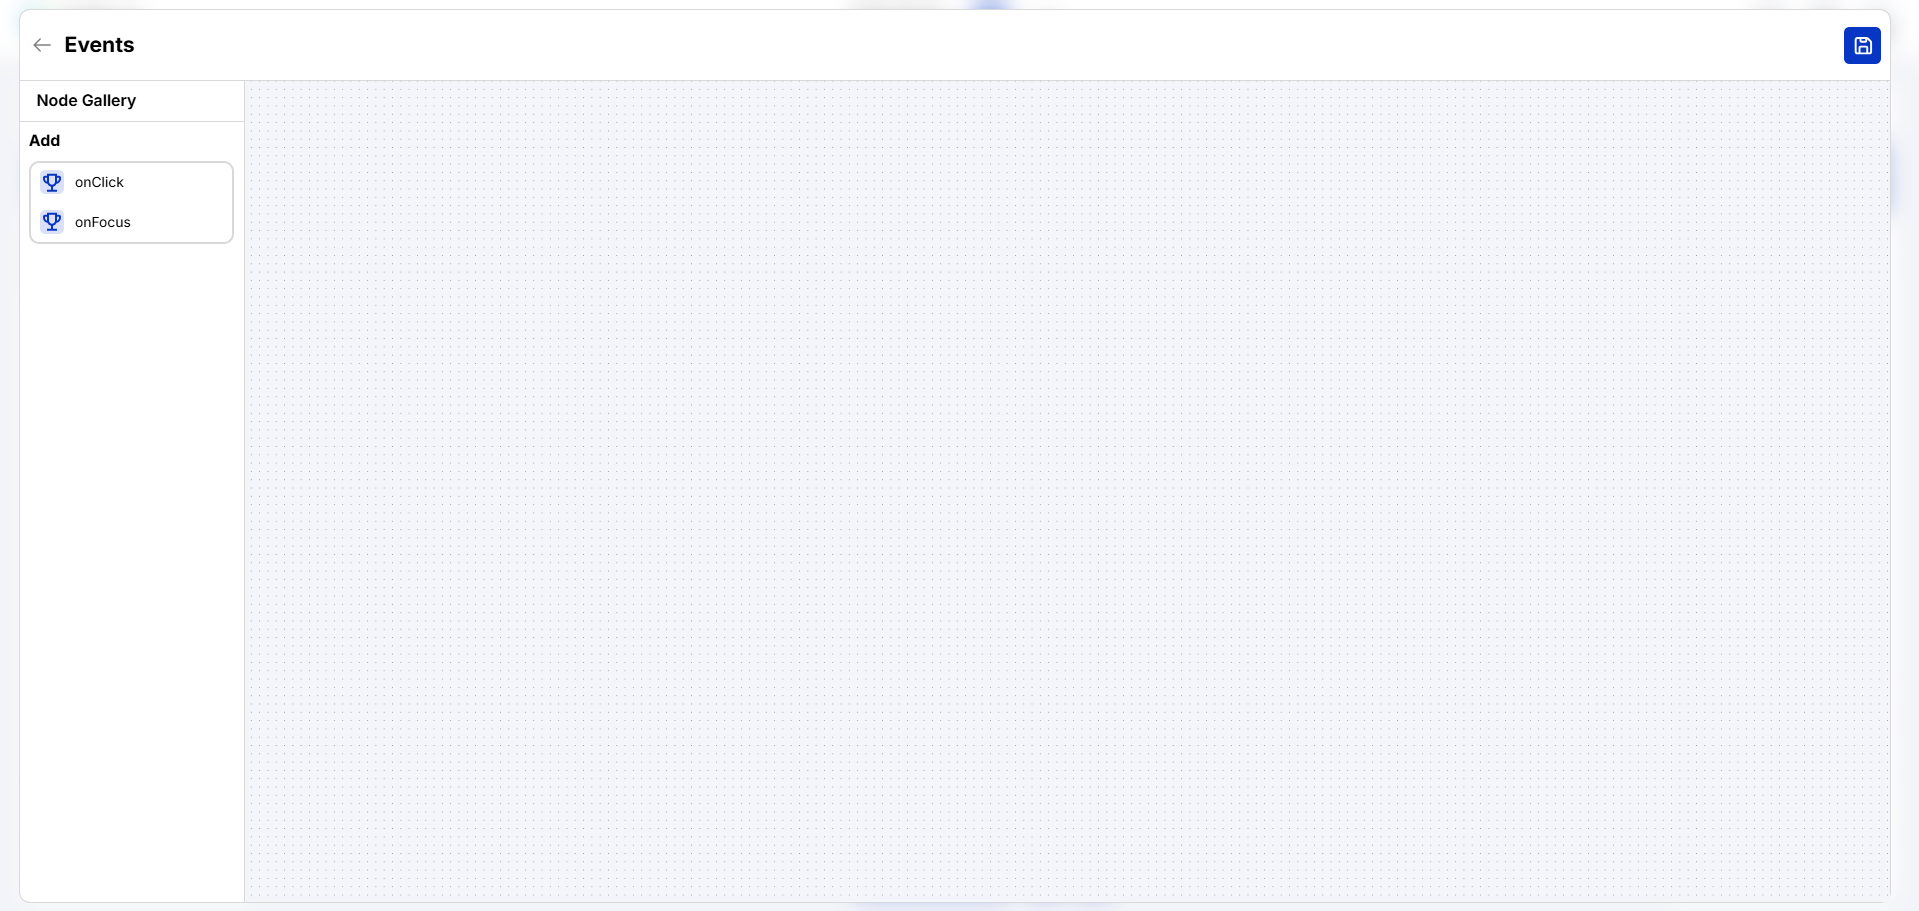
Click on Events
- onClick: Triggered when a button is clicked.
- onChange: Triggered when the value of an input field (including a switch) changes.
Adding Events to Approve Button
- In the Logic Center, select the "Approve" button.
- Events Screen will load with two events as onClick and On Focus.
We need 3 things to be done ‘onClick’ button.
- update database,
- info (pop up message/acknowledgement),
- refresh two pages (Home Screen and Daily Expense Screen both using this field)
- Display an info message on record update
- Refresh both relevant pages after update
- Disable claim manager comment section on the current screen
- Emit an event for future use in process automation.
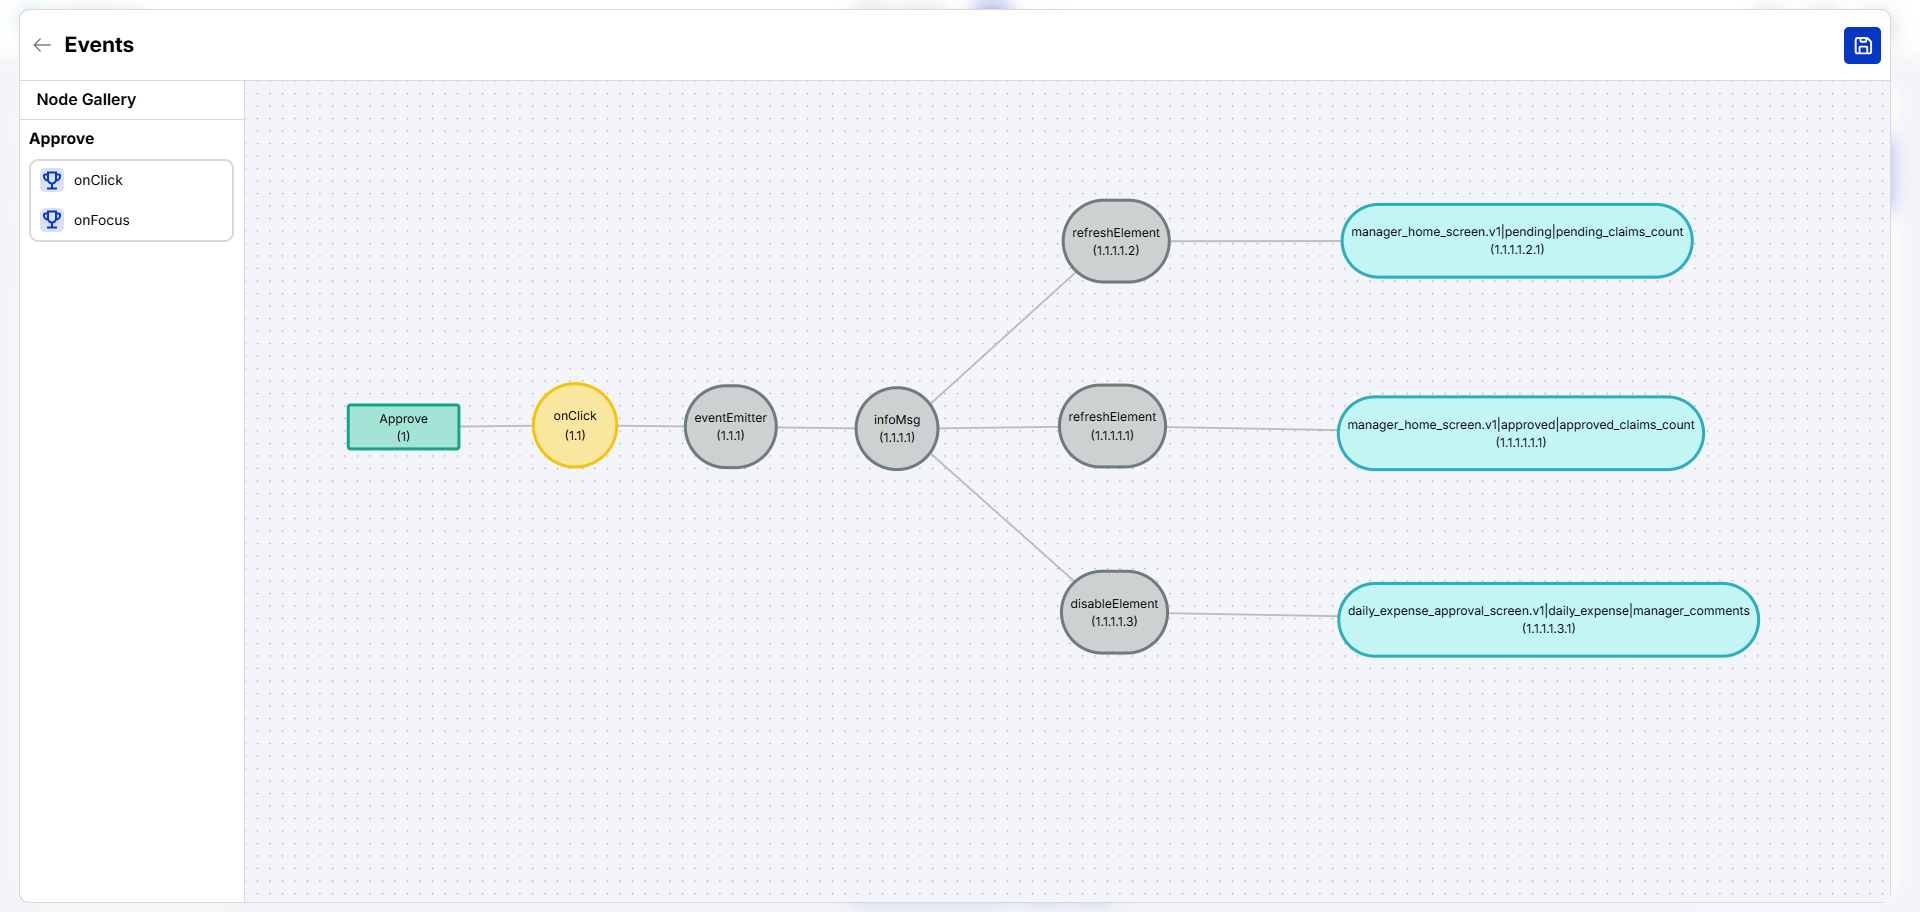
Drag and drop onClick button to the canvas, you will get Add button and onclick node in the canvas
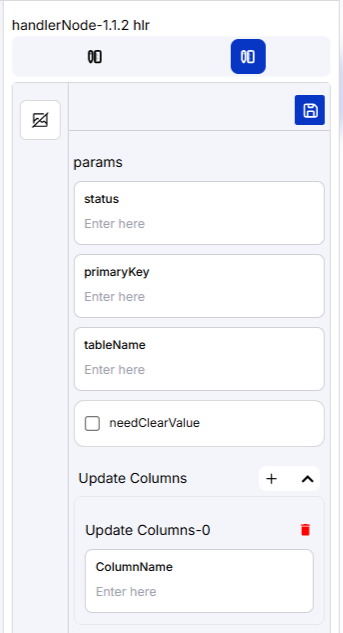
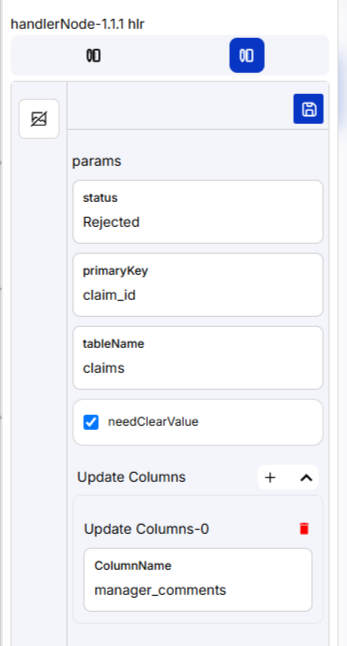
- Right click on onClick node and edit node, we will the node property
- choose ‘Save Handler’ in the nexthandler field which allows the data to get saved
- then right click on the Save handler then click choose infomsg
- rise –allows to do the next action
- riselisten – allows to update some element and perform next action
- choose refreshElement in nexthandler it will ask details to which artifact to be refresh. choose userHomeScreen then click ok.
- now add another refreshElement to the info msg the riselisten then choose daily expense page.
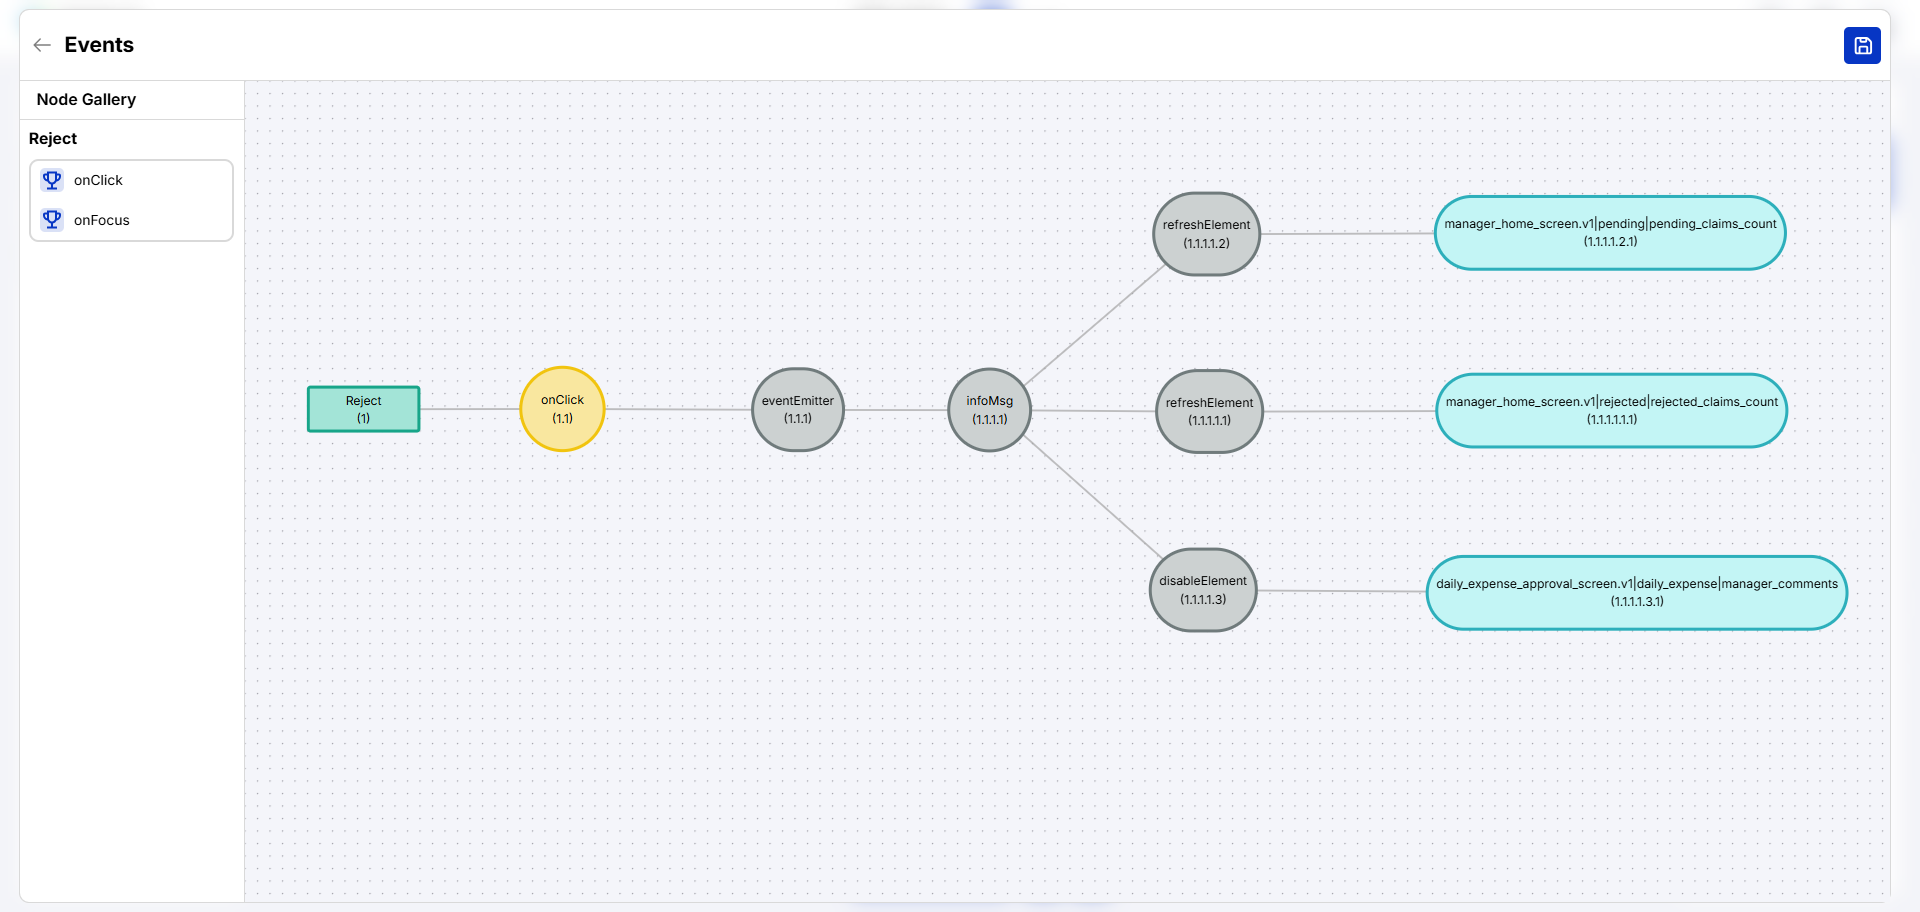
- In the node property of event emitter, update riseandlisten as shown in below screens